Focus on Fabrication
Unless you love mindless practice and building muscle memory, you need another source of motivation for the effort you will need to expend to become a proficient welder. Sure, producing a superior weld has its own reward, but that will fade with repetition. Products you can view and use will put those great welds to a purpose, and give you even more enjoyment on multiple levels.
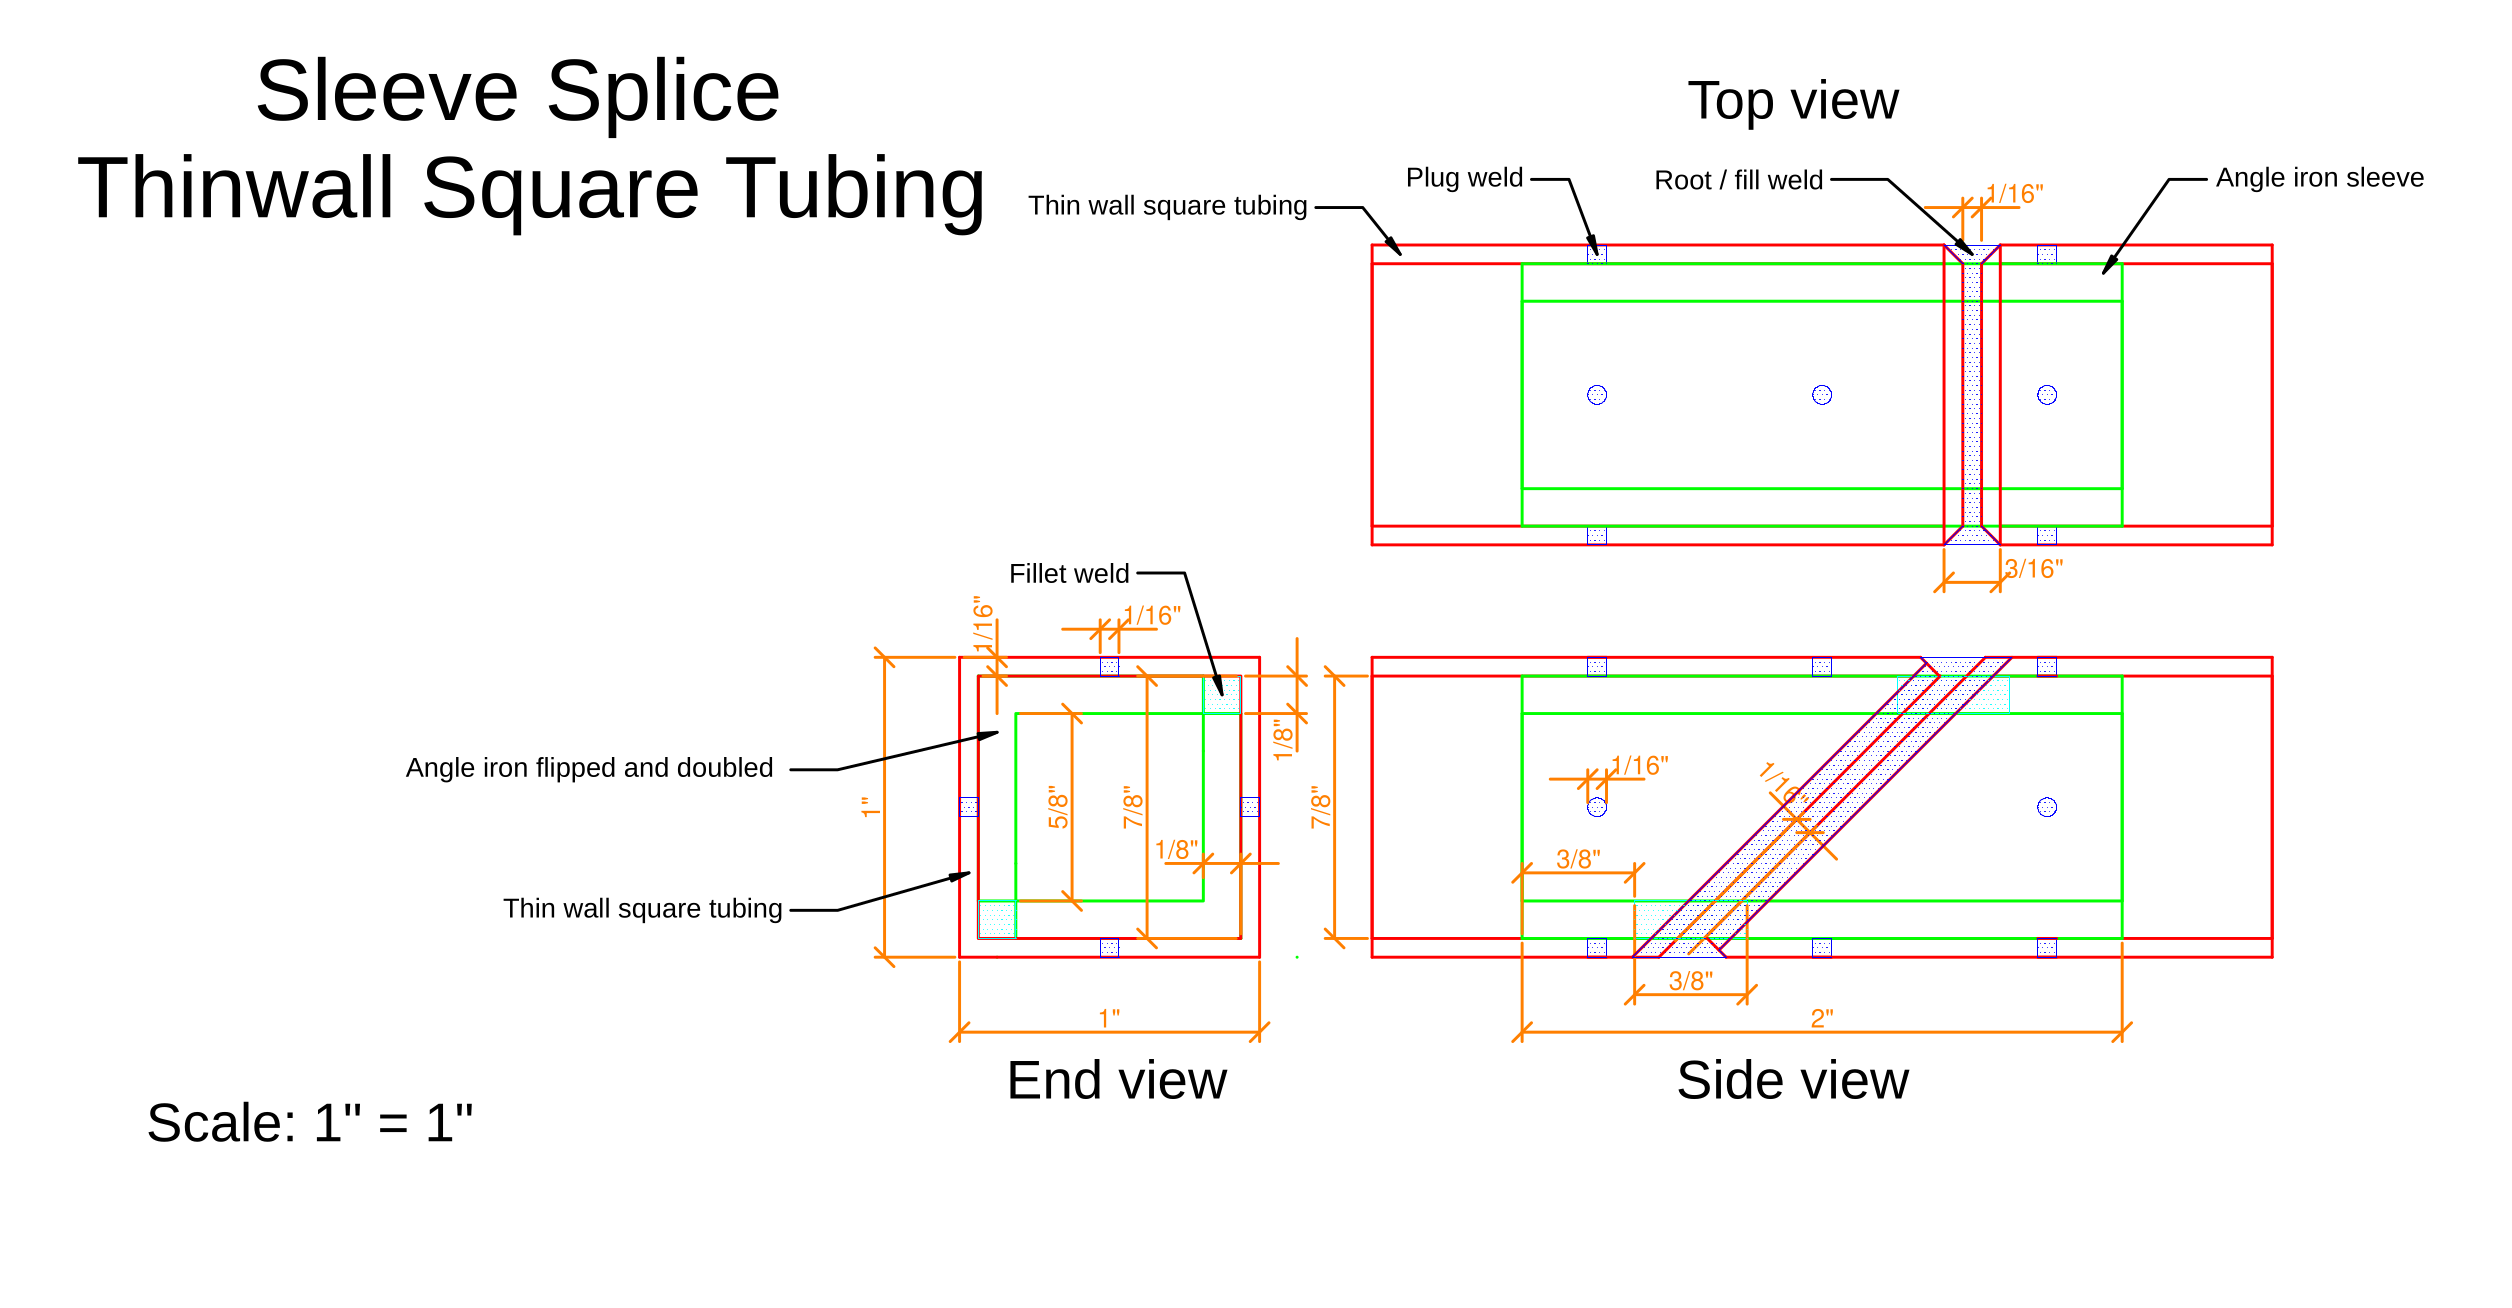
This lesson deals with not just learning to weld, but welding something. Maybe you expect to weld coupons as a beginner, and these undoubtedly are good learning tools, but why not push the boundaries and actually create something that has larger implications? This could be a particular joint that you will use many times on future projects. It could be a structure that distributes force, such as the web lattice of a truss.
Designing practice pieces that have important roles in many applications fulfills several purposes:
- It provides an extra sense of meaning to your practice.
- It prepares you for challenging projects.
- It furnishes your mind with components that you can employ in design.
- It extends your knowledge beyond technique and into the realm of physics and art.
Let's break this process down into logical steps:
- The idea
- Perhaps you have a need, such as the Hoop house rib extension
- You see something cool that you want to build, like a custom bicycle.
- You hear about a certain type of weld that you would like to explore, like a root weld for a pipe joint.
- Build a steel truss for a building roof.
- The sketch
- You look around for examples of what you want to do.
- You modify what you find to meet your own needs and desires.
- Now you commit your idea to a preliminary sketch to capture your ideas.
- The design
- This stage involves detailed plans for the object's use.
- A scale model using inexpensive materials can further the design. It may be considered an intermediate step to aid the thinking process, such as the maquette that sculptors or architects create.
- Engineering analysis to manage forces and specify materials.
- The mock up and prototype
- Mock ups provide 2 dimensional views of an object to communicate basic concepts.
- Prototypes create the object in three dimensions using convenient materials to refine measurements and test feasibility.
- You may need a detailed drawing of the object with dimensions.
- You might want to test the design concept with actual conditions, with forces or in relation with other parts.
- The fabrication design explores how the object can be created with materials and techniques.
Maybe we are getting ahead of ourselves. It is easy to become discouraged by the enormity of what we are attempting. Rather than think we have to build a bicycle while learning to weld, might it be more prudent to just try a few joints in thin wall pipe? That might fuel our dreams of someday creating a complete bicycle frame, without imposing a heavy burden upon our fragile infant welder ego.
The takeaway from this lesson is then to devise practice pieces with potential. They may still be rather humble and simple, but they possess that indefinable spark of life, such as seeds from plants. Given the right circumstances, and assuming you have developed the necessary skill, those seeds may sprout into numerous projects, a garden of useful and delightful objects.
Let's take our steel truss as an example of a future project that involves many simple connections. Here is a video that shows a DIY approach to building steel trusses of your own design using common materials.
Here is another example using round rod for the webs, which are sandwiched between the two angle iron flanges on the top and bottom that make up the T beam.